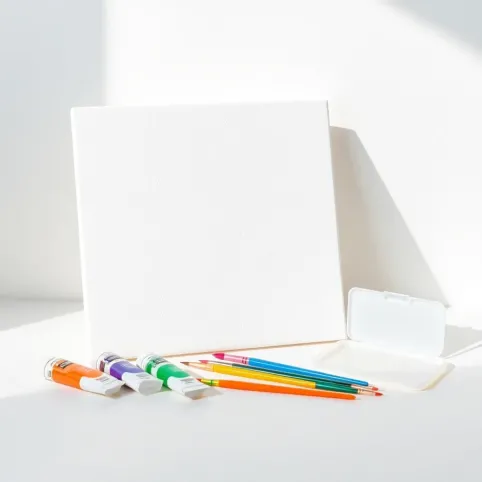
Odśwież kuchnię w 2026: malowanie mebli z okleiny krok po kroku
Kitchen cabinets covered with foil can look tired after years of use, and the idea of replacing them entirely often feels like an overkill when the structure itself is solid. But here's the thing most homeowners assume that smooth, glossy veneer won't accept paint, that it'll peel off within weeks or look patchy no matter what they do. That assumption stops people from trying, even though modern priming systems have genuinely changed what's possible. The frustration of living with a kitchen that feels dated, while knowing a fresh color could transform the whole space, is more common than you'd think and it doesn't have to end in a costly renovation. What if the solution was already sitting in front of you, waiting for the right technique?
- Przygotowanie powierzchni przed malowaniem
- Dobór farby i gruntowania do okleiny
- Nakładanie farby krok po kroku
- Wykończenie i zabezpieczenie powłoki
- Malowanie mebli kuchennych z okleiny pytania i odpowiedzi
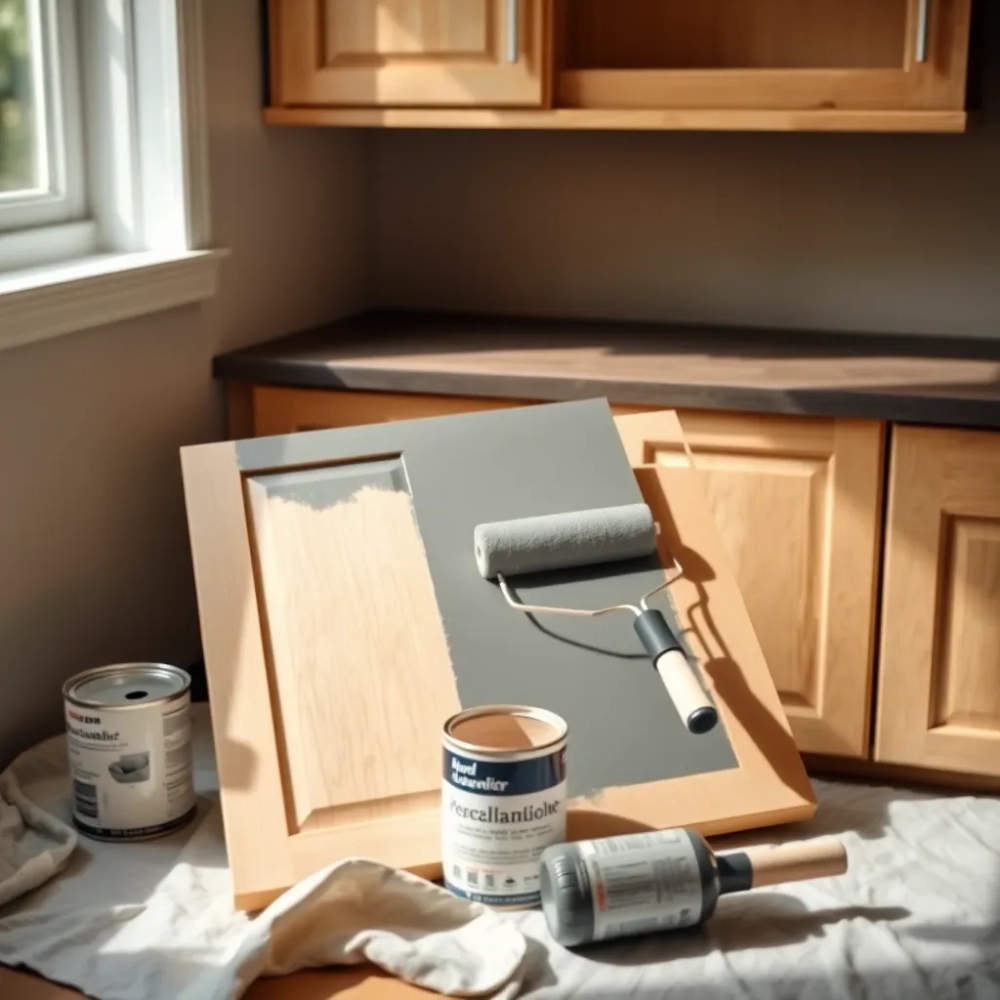
Przygotowanie powierzchni przed malowaniem
Success with veneer starts long before you open a paint can it starts with understanding what that surface actually is. Foil covering used on kitchen furniture is typically a thin layer of printed paper or polypropylene thermally fused to a substrate, usually MDF or particleboard. This produces an extremely smooth, non-porous barrier that paint alone cannot grip, which is precisely why preparation matters more here than with solid wood. Without creating microscopic roughness, your new finish will sit on top like a sticker rather than bonding into the surface, and that distinction will show within weeks.
The first real step involves removing all hardware handles, hinges, and any decorative elements because painted metal quickly looks sloppy if you don't protect it beforehand. Work in a well-ventilated space and lay down drop cloths to catch dust and accidental drips. Once the cabinet doors are demounted, clean every visible surface with a dedicated degreaser formulated for kitchen use, because factory oils, cooking residue, and fingerprints all compromise adhesion. Apply the cleaner with a non-abrasive cloth, let it sit for the time specified by the manufacturer, then wipe dry never let residue dry on the surface.
Light sanding creates the mechanical key that makes primer stick, but veneer is thin enough that aggressive sanding will burn through it in seconds, exposing the MDF underneath and ruining your work. Use 180-240 grit sandpaper and work with even, circular motions, applying just enough pressure to noticeably dull the glossy sheen. The goal is not to remove the foil it's to scratch it gently, creating peaks and valleys too small to see but large enough for primer to anchor into. After sanding, vacuum thoroughly and follow with a tack cloth or a barely damp wipe to capture every particle, because dust under primer creates a weak boundary layer that causes later delamination.
Inspect the surface carefully at this stage. Any loose edges, air bubbles, or peeling corners need addressing before you proceed these defects will telegraph through the paint and grow over time. Secure lifting edges with a small amount of wood glue applied under the foil, clamp if necessary, and allow full curing before continuing. Fill any chips or gouges with a polyester filler suitable for engineered wood, sand flush once cured, and ensure the repaired area matches the surrounding texture. Skipping this step saves an hour now but costs you a refinish within a year.
Dobór farby i gruntowania do okleiny
Primer is not optional on foil it's the single most critical component of the entire process, and choosing the wrong type will undermine everything that follows. Standard wall primers are too soft and too porous for this application; they won't cure to a hard enough film to support a durable topcoat on a slick surface. What you need is a dedicated adhesion promoter specifically engineered for laminate, melamine, or foil substrates, typically a water-based formula with specialized polymers that chemically bond to the surface while providing a textured profile for paint to grip. Apply it in a thin, even coat using a foam roller to avoid brush marks, and let it cure according to the technical datasheet rushing this stage is where most failures originate.
For the paint itself, water-based acrylic formulations designed for furniture and cabinetry give the best balance of durability, low odor, and ease of application in a home environment. Acrylic paints cure through water evaporation and polymer cross-linking, producing a flexible film that expands and contracts slightly with temperature changes without cracking essential in a kitchen where heat and humidity fluctuate daily. Avoid oil-based paints unless you use a separate bonding primer first, because their longer open time increases the risk of dust contamination between coats and their strong solvents can soften certain foil adhesives underneath. If you want a matte finish, choose a paint with a built-in primer; for satin or semi-gloss, apply a separate topcoat for better washability.
Chalk paints have gained popularity for furniture projects, but they require a compatible sealer on foil because their porous nature makes them vulnerable to grease penetration in a kitchen setting. They work best when you plan to distress the finish for a vintage look, not when you need a bulletproof surface that survives daily wipe-downs. If you prefer chalk paint, always topcoat with a water-based polyurethane designed for furniture, applied in two thin layers after the paint has fully cured. The extra step adds time but significantly extends the lifespan of your finish in a high-traffic zone like a kitchen.
Porównanie farb do mebli kuchennych z okleiny
| Typ farby | Czas schnięcia między warstwami | Wydajność | Odporność na wilgoć | Cena orientacyjna |
|---|---|---|---|---|
| Akrylowa do mebli | 2-4 godziny | 10-12 m²/l | Wysoka po utwardzeniu | 35-60 PLN/l |
| Lateksowa z podkładem | 3-5 godzin | 8-10 m²/l | Średnia | 25-45 PLN/l |
| Kredowa z sealantem | 24 godziny | 8-10 m²/l | Niska bez uszczelnienia | 40-70 PLN/l |
| Poliuretanowa do mebli | 4-6 godzin | 12-15 m²/l | Bardzo wysoka | 50-80 PLN/l |
Nakładanie farby krok po kroku
Thin layers are non-negotiable when painting foil-covered cabinets, because thick applications are the primary cause of visible drips, sagging, and extended curing times that invite dust contamination. Load your brush or foam roller lightly the paint should flow off the applicator in a smooth ribbon rather than pooling. Apply each coat in long, overlapping strokes following the grain direction if your cabinets have one, or in a consistent back-and-forth motion if they don't. Work systematically from top to bottom, left to right, and resist the urge to go back over a wet section to fix missed spots that breaks the forming skin and creates lap marks.
Two to three coats typically achieve full coverage on foil, depending on the original color of the veneer and the opacity of your chosen paint. The first coat will look uneven and may show roller texture that's normal and expected. What matters is that it's thin enough to dry without sagging, which allows proper cross-linking of the acrylic polymers. Let each coat dry completely before recoating, checking the manufacturer's specified interval and adjusting for humidity in damp conditions, wait longer rather than risking trapping moisture that will weaken the bond.
Between coats, a light scuff with 320-400 grit sandpaper removes any nibs, dust bumps, or brush marks that formed during drying, creating a perfectly smooth base for the next layer. Wipe the surface with a barely damp cloth after sanding to remove all residue, then allow it to dry fully. This intermediate sanding step is what separates a professional-looking result from an amateur one, and skipping it to save time is a false economy every imperfection you leave will be magnified by the final topcoat. Use a good-quality LED work light angled across the surface to spot defects that are invisible under normal lighting.
During application, maintain consistent ambient conditions: temperature between 18-24°C and relative humidity below 65% these ranges optimize paint flow, levelling, and curing. Direct sunlight on wet paint causes rapid surface drying while the layer beneath remains liquid, leading to wrinkles and uneven sheen. If your kitchen gets strong afternoon light, plan your painting schedule accordingly or use curtains to diffuse the rays. Good ventilation accelerates curing but avoid strong drafts that carry dust onto wet surfaces.
Wykończenie i zabezpieczenie powłoki
A topcoat transforms your painted surface from a decorative layer into a durable, cleanable finish capable of withstanding the demands of a working kitchen. Without it, painted foil remains vulnerable to moisture ingress at the edges, scuffing from daily use, and grease staining that can penetrate even well-adhered paint films over time. Water-based polyurethane in satin or semi-gloss gives excellent protection while maintaining the visual warmth you achieved with your color choice high-gloss shows every imperfection but offers the easiest cleanability, while matte hides minor wear better.
Apply the protective coat exactly as you did the paint: thin layers, even coverage, adequate drying time between applications. Two coats are sufficient for most kitchen environments; a third adds marginal durability but significantly extends your project timeline. The first coat of topcoat may slightly darken or shift the color tone as it fills the microscopic texture left by sanding this is normal and will stabilize after the second coat. Allow the final coat to cure fully before reassembling hardware, because premature loading puts stress on incompletely cross-linked polymer films.
Full cure takes approximately seven days, during which the paint and topcoat continue hardening through a chemical process that cannot be accelerated without risk. You can reinstall cabinet doors after 48 hours and use the kitchen gently, but avoid placing heavy objects on surfaces, scrubbing stains, or exposing the finish to prolonged moisture during the curing window. After one week, the surface reaches its final hardness and chemical resistance at this point, it's safe to clean with a soft, damp cloth and mild detergent without concern. Abrasive sponges, harsh chemicals, or steam cleaners will degrade even the best topcoat over time, so establish gentle cleaning habits from day one.
Consider the edges and hardware mounting points as your primary maintenance focus, because these areas experience the most mechanical stress and moisture exposure. Reapply a thin layer of topcoat to any worn edges every two to three years to maintain protection, and address any chips or delamination immediately by lightly sanding the affected area, priming, and touching up with the original paint color. With this simple maintenance routine, a professionally executed paint job on foil-covered kitchen furniture can easily last eight to twelve years before needing attention comparable to factory-finished surfaces at a fraction of the cost and environmental impact of replacement.
Praktyczny podsumowanie kosztów i czasu
| Etap pracy | Czas realizacji | Szacunkowy koszt materiałów |
|---|---|---|
| Przygotowanie powierzchni | 1-2 godziny | 20-40 PLN |
| Gruntowanie | 2-3 godziny łącznie z suszeniem | 30-50 PLN |
| Malowanie (2-3 warstwy) | 4-6 godzin pracy, 2-3 dni przerwy | 80-200 PLN |
| Wykończenie ochronne | 3-4 godziny łącznie z suszeniem | 40-70 PLN |
| Czas całkowity do pełnego użytku | 7 dni | 170-360 PLN |
Refreshing your kitchen through painting isn't just a budget alternative to replacement it's a legitimate renovation strategy that, when done correctly, delivers results that stand up to daily life for years. The materials cost a fraction of new cabinetry, the process generates minimal waste, and you gain complete freedom over color and finish in a way that simply isn't available with stock furniture. Every technique in this guide exists because it addresses a specific physical challenge of the material, and understanding those challenges is what separates a durable result from a frustrating one. Your kitchen deserves to feel current, and now you have everything needed to make that happen without a single trip to the showroom.
Malowanie mebli kuchennych z okleiny pytania i odpowiedzi
Jakie materiały są potrzebne do malowania mebli kuchennych z okleiny?
Potrzebne będą: drobnoziarnisty papier ścierny (gradacja 180‑240), środek odtłuszczający lub specjalny cleaner, primer przeznaczony do laminatów i oklein, farba odpowiednia do tego typu powierzchni (np. akrylowa na bazie wody, lateksowa z dodatkiem primeru adhezyjnego lub dedykowana farba do okleiny), pędzel lub wałek piankowy, taśma malarska, przezroczysty lakier ochronny (wodny, niskopachnący), plandeka, rękawice, maska ochronna oraz gogle.
Jak prawidłowo przygotować powierzchnię okleiny przed malowaniem?
Najpierw usuń wszystkie uchwyty i okucia. Następnie dokładnie oczyść powierzchnię okleiny środkiem odtłuszczającym, aby pozbyć się tłuszczu i brudu. Po wyschnięciu delikatnie przeszlifuj okleinę drobnoziarnistym papierem ściernym (180‑240), tworząc mikroskopijną chropowatość ułatwiającą przyczepność farby. Wytrzyj powierzchnię wilgotną szmatką, pozostaw do całkowitego wyschnięcia, a następnie nałóż równą warstwę primeru przeznaczonego do laminatów/oklein i pozostaw do wyschnięcia zgodnie z instrukcją producenta.
Jaką farbę wybrać do malowania mebli kuchennych z okleiny?
Najlepiej sprawdzają się farby wodne przeznaczone do melaminy/okleiny, np. akrylowe farby na bazie wody z dodatkiem primeru adhezyjnego, lateksowe farby z primerem do laminatów lub dedykowane farby do okleiny dostępne pod markami Sherwin‑Williams Emerald, Benjamin Moore Regal czy Rust‑Oleum Cabinet Transformations. Unikaj farb olejnych bez odpowiedniego primeru, ponieważ mogą one nie związać się z gładką powierzchnią okleiny.
Ile warstw farby należy nałożyć i jakie są zalecane czasy schnięcia?
Zaleca się nakładanie 2‑3 cienkich warstw farby, każda o grubości pozwalającej na równomierne rozprowadzenie bez zacieków. Przed nałożeniem kolejnej warstwy odczekaj około 2‑4 godzin w zależności od temperatury i wilgotności pomieszczenia. Po nałożeniu każdej warstwy (opcjonalnie) delikatnie przeszlifuj powierzchnię drobnoziarnistym papierem, aby uzyskać gładki efekt. Pełne utwardzenie farby trwa zazwyczaj do 7 dni; przez pierwsze 48 godzin unikaj intensywnego użytkowania mebla.
Czy konieczne jest nakładanie dodatkowego lakieru ochronnego?
Tak, aby zabezpieczyć farbę przed wilgocią, zadrapaniami i codziennym zużyciem, warto nałożyć 1‑2 cienkie warstwy przezroczystego lakieru ochronnego na bazie wody. Lakier ten tworzy cienką powłokę, która przedłuża trwałość malowania i ułatwia późniejsze czyszczenie powierzchni.
Jakie błędy najczęściej popełniają amatorzy podczas malowania okleiny?
Najczęstsze błędy to: pomijanie szlifowania i/lub primeru, stosowanie farb olejnych bez odpowiedniego podkładu, nakładanie grubych warstw farby prowadzących do zacieków, zbyt krótki czas schnięcia między warstwami oraz rezygnacja z lakieru ochronnego. Wszystkie te czynniki mogą skutkować słabą przyczepnością farby, nierównym wykończeniem oraz szybkim zużyciem powierzchni.